


The number of users online and using the Internet to share, send, and receive files has increased at an unparalleled rate over the last decade.
There’s also the ever-increasing popularity of USB sticks, many of which are so small and common that they can be used as keychains and have storage capacities in the terabytes.
To many, this creates a vivid picture of opportunities for malware, viruses, and hacking efforts increasing in the same proportion.
Microsoft has sought to fight this with Windows Defender, a built-in security tool included in their OS from Windows 7 and up, ensuring that even individuals who are unaware of these risks are adequately protected.
What’s the irony? With all of its real-time security protection, Windows Defender either falls short of most users’ needs or is wasteful and obtrusive despite being hyper-vigilant.
People hunt for a way to disable Windows Defender or, if they have far better options, windows defender uninstall entirely.
You are already one of us if you are here. Let’s get started.
How to windows defender uninstall
Windows Defender behaves slightly differently depending on the version of Windows.
If you use Windows 7 or 8, you must disable Windows Defender completely and manually if you want to use another anti-virus or firewall.
Turning off Windows Defender in Windows 10 is primarily optional, as it eliminates real-time protection when another third-party security app is installed.
Step 0: On either version of Windows, search the phrase “defender” to open Windows Defender from the Start button or the Search Box in the toolbar.
(If the Settings option appears, go there; otherwise, you can find Settings in the top-right corner or bottom-left corner of Windows 10 or the Tools setting in the top bar of Windows 7.)
First, we’ll go through how to disable Windows Defender in Windows 10.
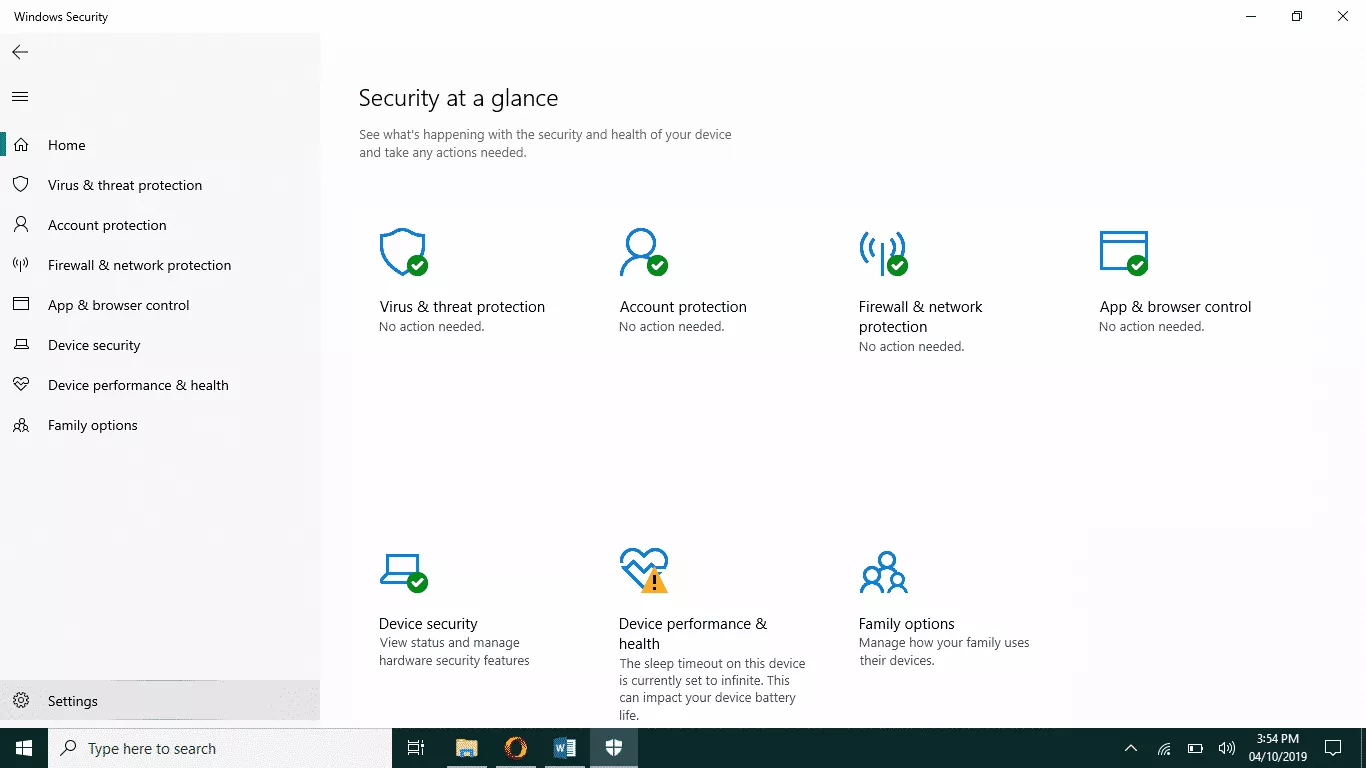
When you arrive, search for a toggle switch with the wording “Real-time protection” that allows you to turn it off.
If you can’t find it right away, go to a tab called Virus & threat protection settings; these options differ between Windows versions.
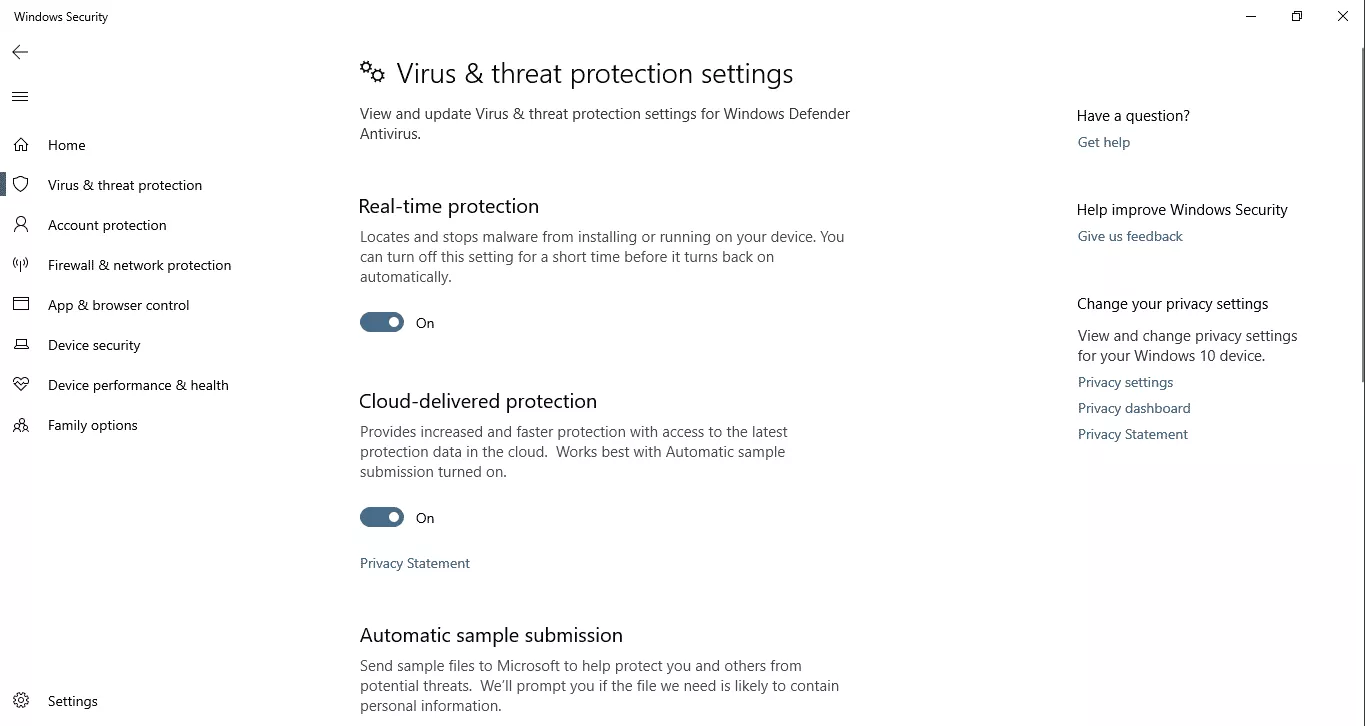
We discovered the Real-time protection setting in the Virus and protection settings because we are using a Professional edition of Windows 10 for Education.
By setting this to Off, you effectively disable Windows Defender.
The procedure for doing the same on Windows 7 is slightly different.
Step 1: Once you’ve arrived at the Tools and Settings screen (as described above in the zeroth step), look for Options.
Step 2: One of the last options in the left-hand pane should be Administrator.
Step 3: On the Administration page, uncheck the box next to “Use this program” and then click Save.
Windows Defender will indicate that you have disabled it.
However, whether on Windows 7 or 10, some users report that Windows Defender restarts itself with each system reboot.
The remedy is a fairly simple hack, which you can locate on the same Settings page we previously directed you to. (If you can acquire a theoretical handle on what we’re doing, which is pretty basic, the process from here on out is same on all versions of Windows.)
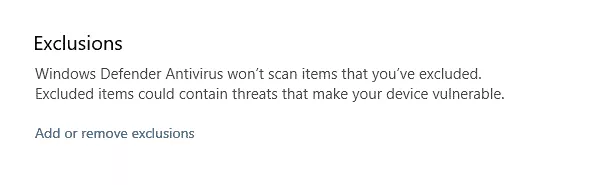
Assume your Windows is installed on the C: drive, which is common.
When you click on Add or remove exclusions, you’ll see something similar to this:
include an exclusion

Pick Folder from the Add an exclusion menu, then select your C: drive and click OK.
The entire C: drive (your entire operating system) is now ‘excluded’ from real-time protection, which means you can install and uninstall software, programs, keygens, and hacks (assuming you know what you’re doing!) without interruption from Windows Defender.
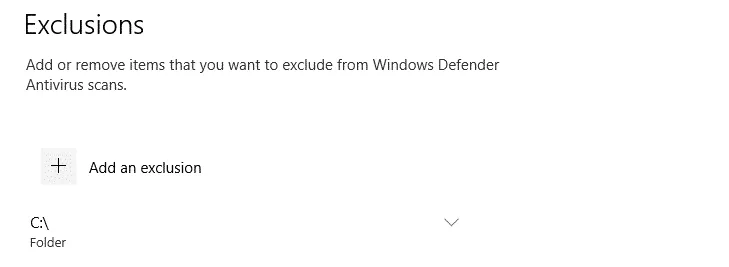
disc c is not included.
There may be direct options for Files and folders, file formats, and processes in different versions of Windows.
Select C: from the Exclude a folder menu under Files and folders. Of course, you can just add each of your drives as an exclusion.
How to Uninstall Windows Defender
While we recommend that you maintain Windows Defender installed and enabled if you don’t have another (better and more robust) anti-virus tool, Microsoft understands that individuals will attempt anyhow.
As a result, any method for removing Windows Defender is just temporary, and it may reappear with the next Windows Update.
However, one approach that yields results is to uninstall Windows Defender via the Windows Registry.
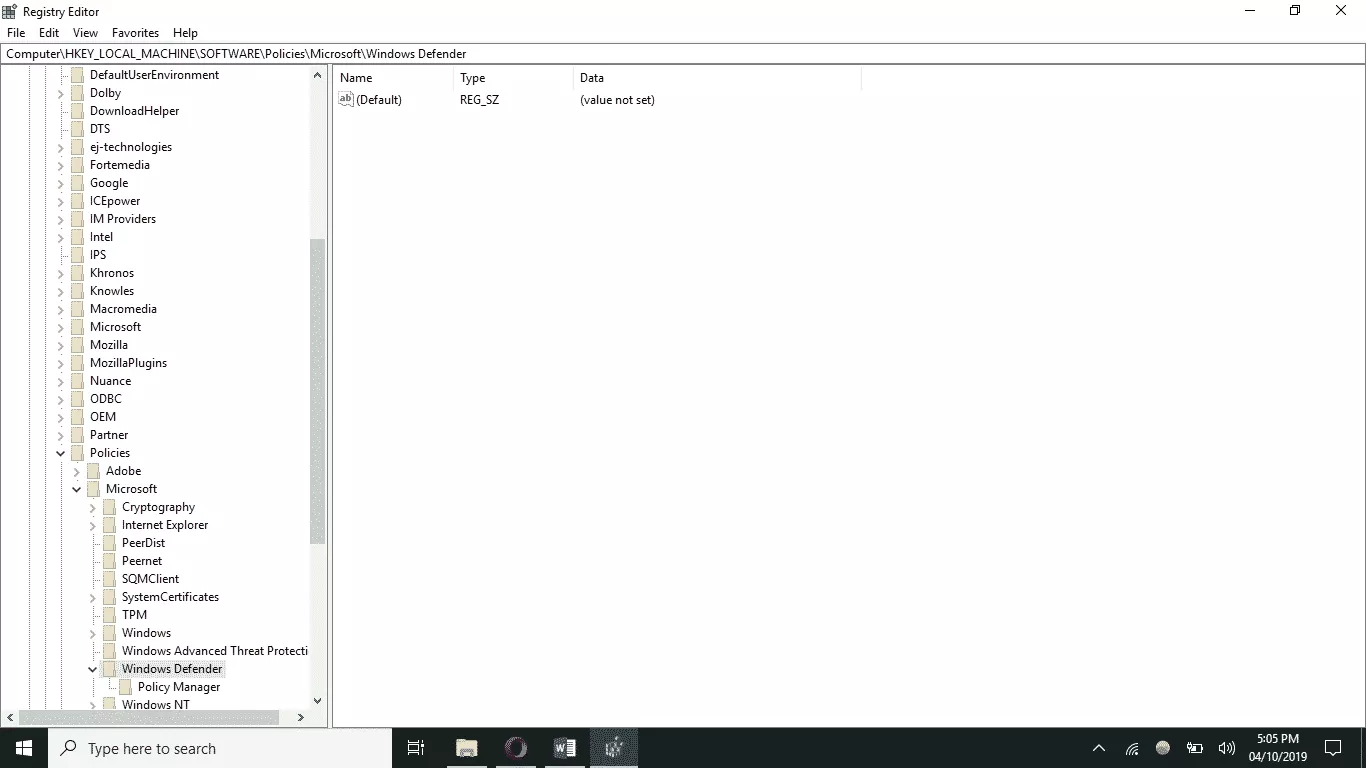
Step 1: Launch the Windows Registry Editor by typing ‘regedit’ into the Search box or using the Run tool.
Step 2: You should notice many keys on the left-hand side, under Computer. HKEY LOCAL MACHINE, SOFTWARE, POLICIES, MICROSOFT, and lastly Windows Defender will be displayed.
Step 3: Right-click in the empty spot on the right, hover over New, and select D-WORD (32-bit) value.
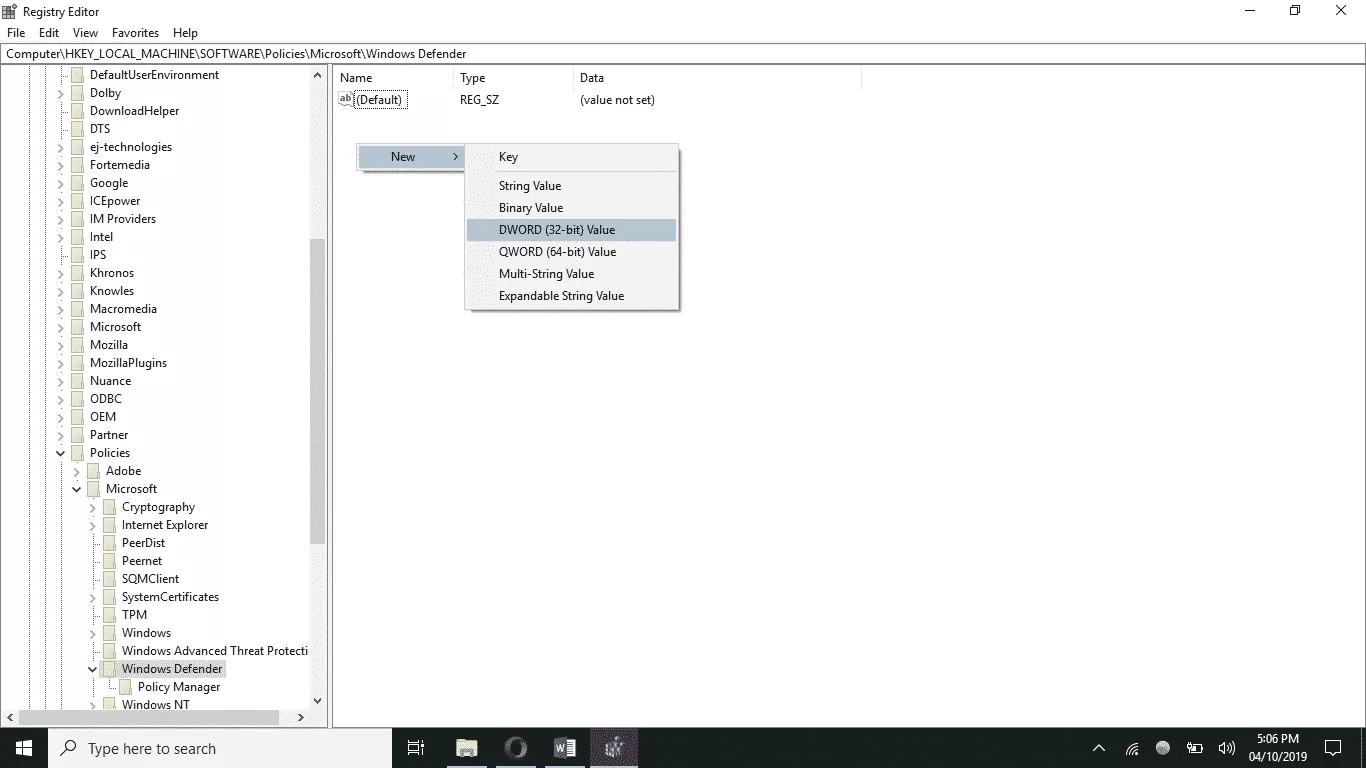
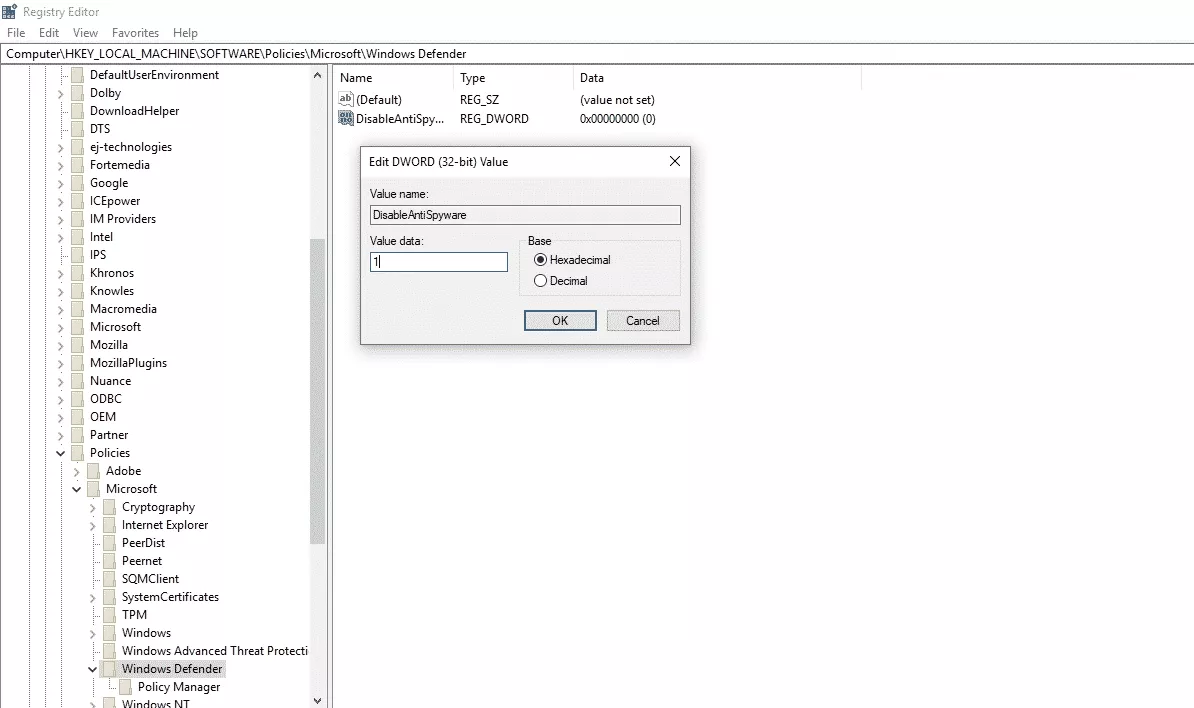
Step 4: Right-click on the newly created item and rename it DisableAntiSpyware.
Step 5: Right-click the DisableAntiSpyware item and set the Value Data to 1.
Step 6: Shut off your computer.
Once completed, Windows Defender will remain deactivated until the next Windows Update — which you may also be able to disable or uninstall, but that is a topic for another blog. For the time being, disabling or deleting Windows Defender should suffice.